
Click here to view this article in full screen.
To view SLA from Reports:
- Open the PS|Track web application.
- From the left menu of any office page, click on reports.
- The default report is by SLA outcome. Add additional criteria as needed or add extra reporting columns using the 'group by' selections.
- Click on the blue show results button.
- Click on any of the listed SLA outcomes to display the full history and detail of the packages for that outcome.
- Results can be printed using your browsers print button, Ctrl P, or the print button.

To view SLA from History:
- Open the PS|Track web application.
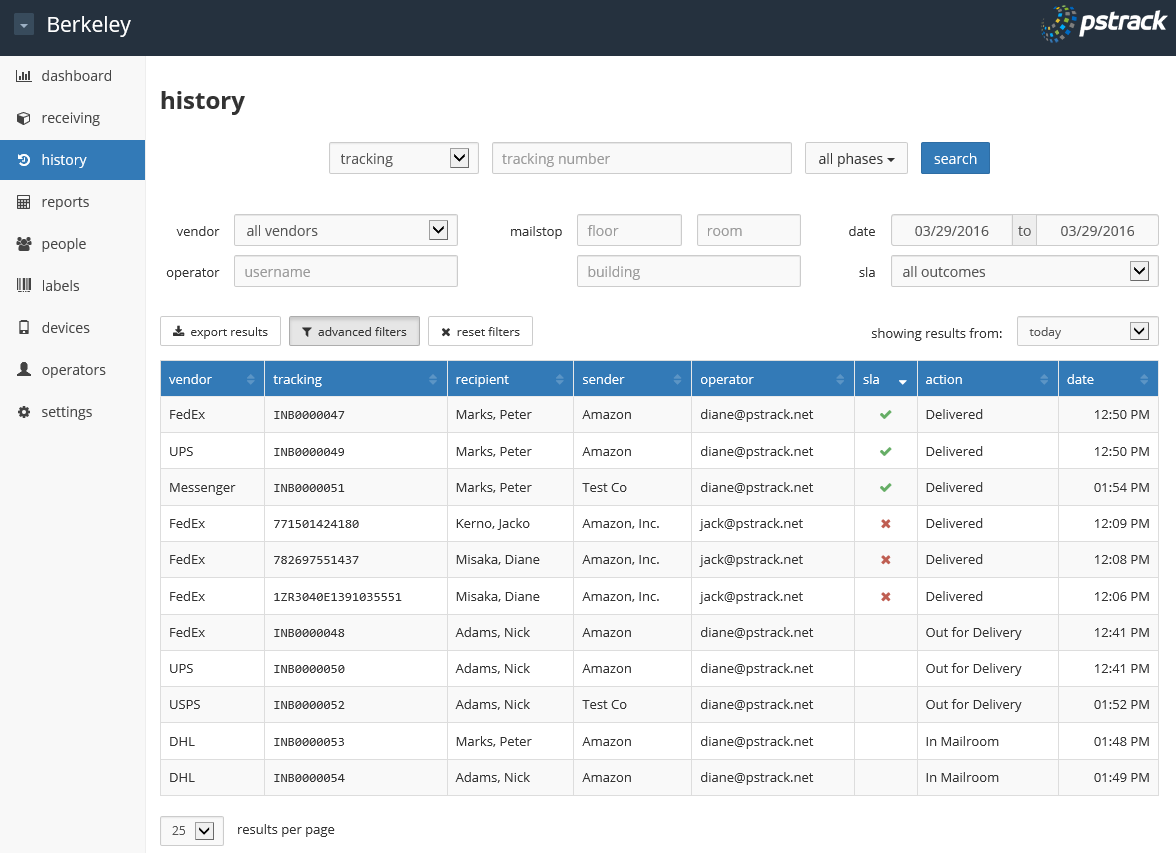
- From the left menu of any office page, click on history.
- The SLA column indicates the SLA outcome for each package. A green check mark indicates an SLA success. A red X indicates an SLA failure. A clock icon indicates that an outcome is still pending. Hover over the icons for more details on each outcome or click the pagckage for full details.
- For additional filters, click on the advanced filters button.
- Click on the sla filter and choose between all outcomes, success, failure or no outcome to view just the specific outcome selected.
- Click on the blue search button to execute the search.
- Click on the down arrow next to the results per page text at the bottom of the screen to view 25, 50 or 100 results per page.
- Click the reset filters button to clear any changed criteria.
- Results can be printed using your browsers print button or Ctrl P, or the print button.
0 Comments